The following guide will walk you through the easy step-by-step process of creating a new Phonic survey and utilizing the various survey features.
What Is An Audio Survey?
Audio surveys, sometimes called voice surveys or asynchronous interviews, refers to any survey where the respondent can answer questions by speaking into their microphone. Phonic allows a recorder to stand alone or supplement a more traditional survey question type. Check out our guide below on how you can create an audio survey in Phonic.
Step 1: Create Survey
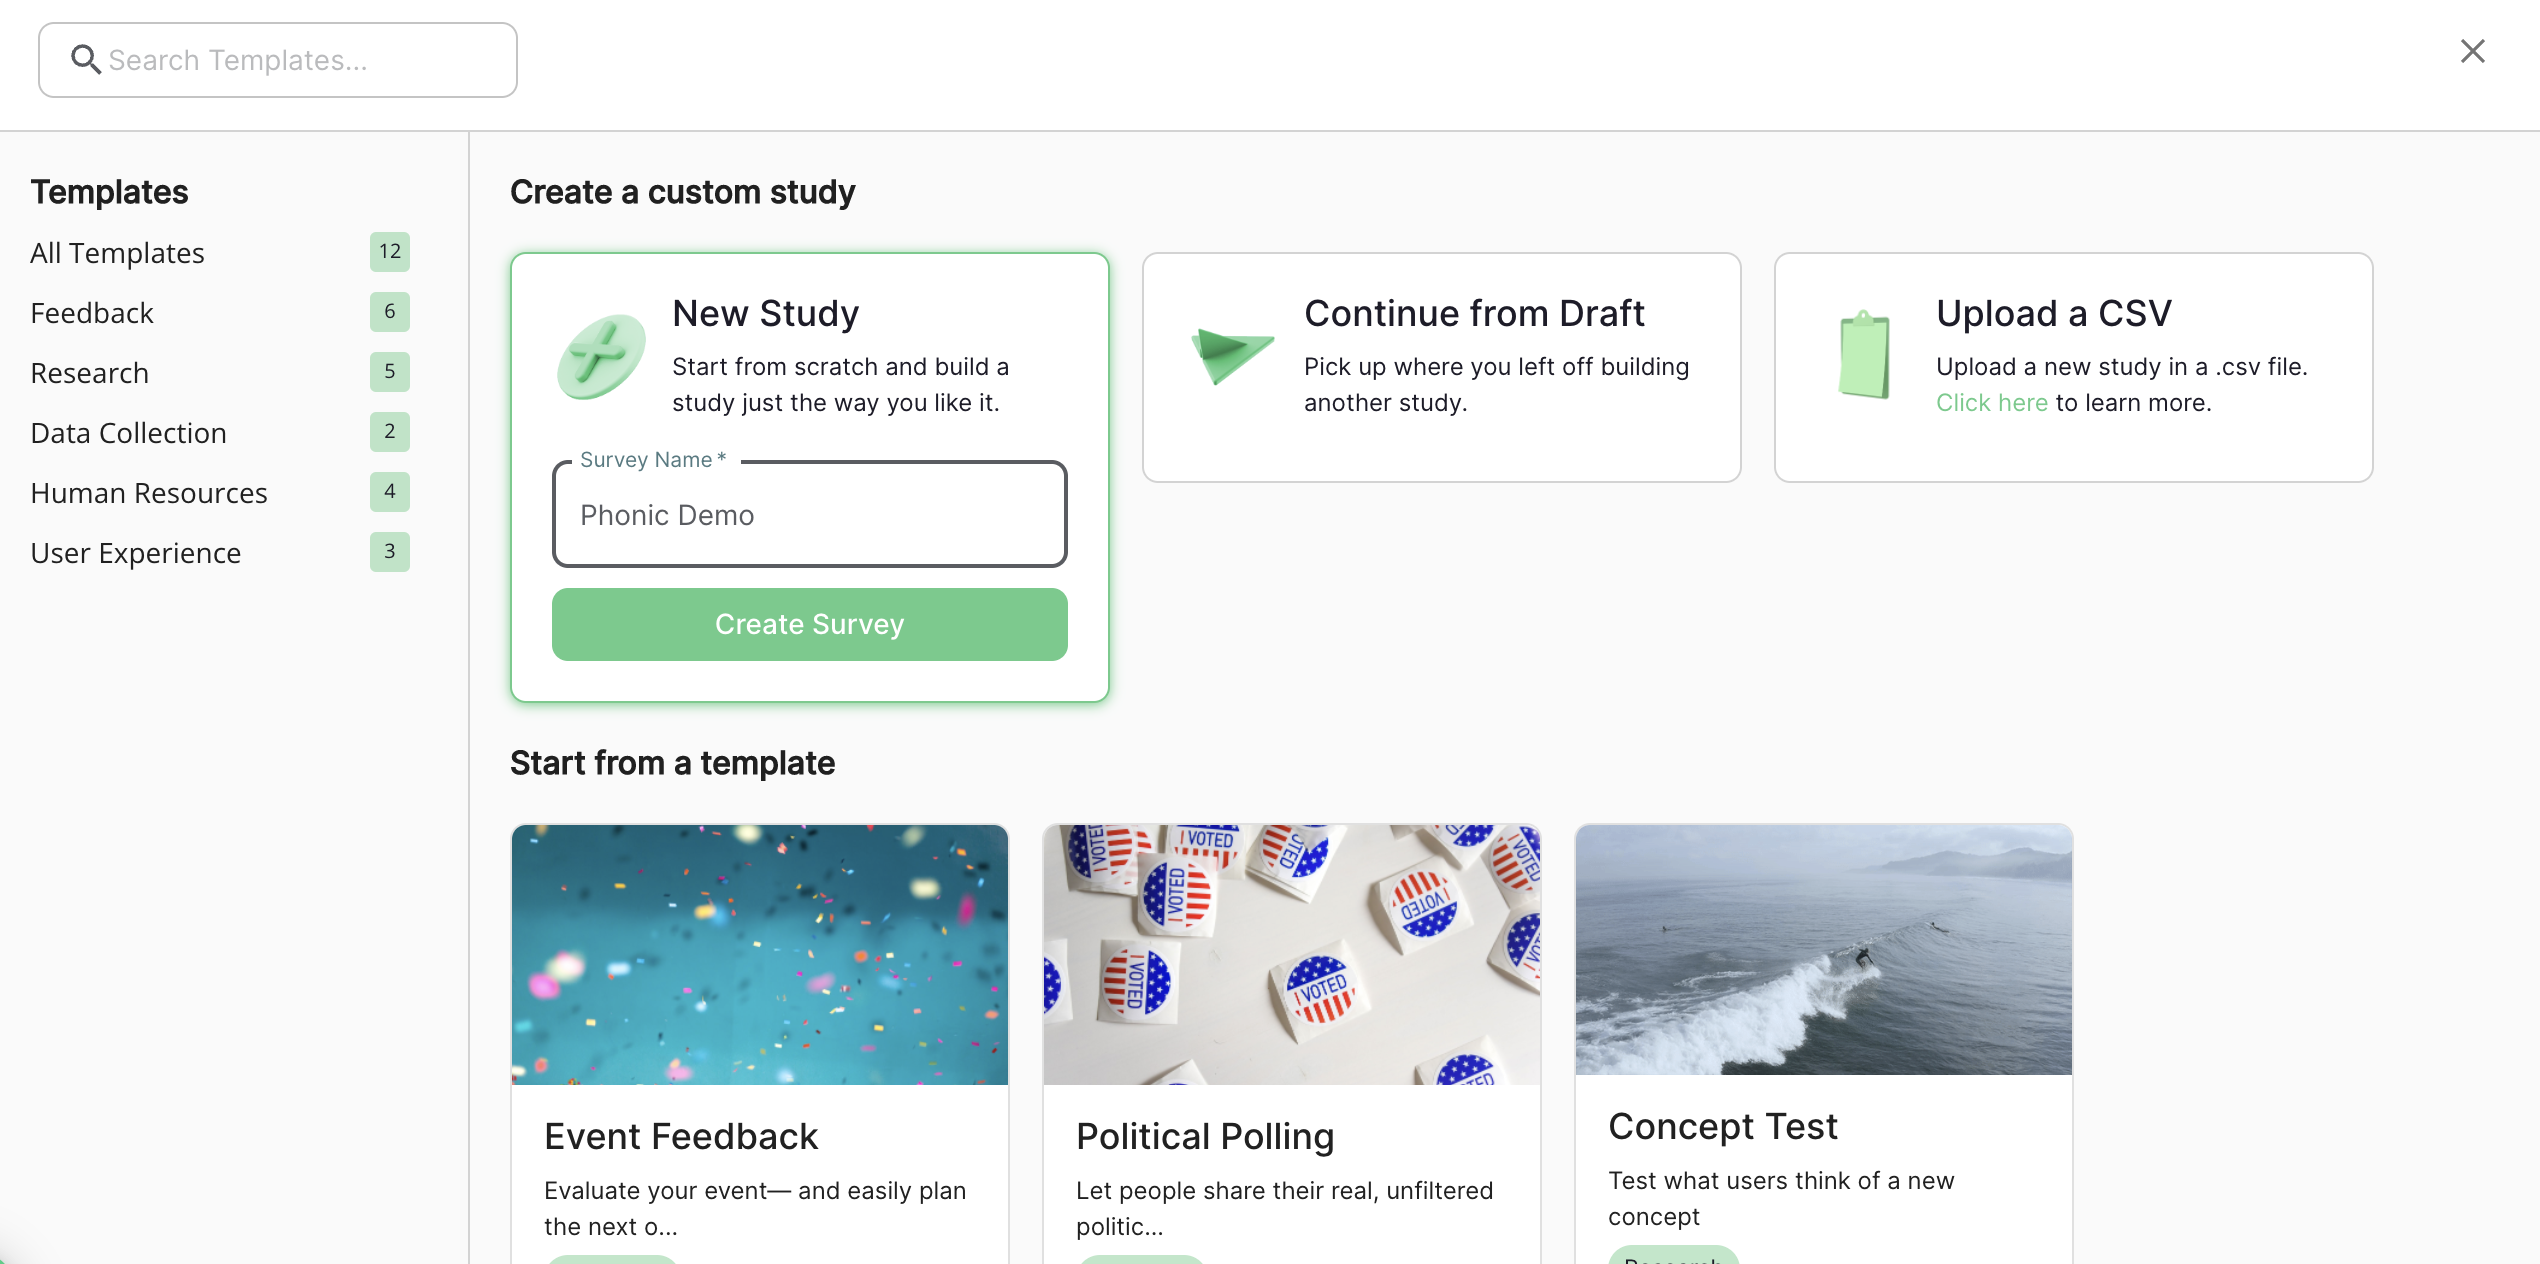
If you haven't already, create your phonic account here. After logging in, you can create a new survey by clicking the green “New Survey” tile on your Surveys page. A pop-up will appear with the option to create a survey from scratch, continue from a draft, or create a survey from our template library. To create a new survey from scratch, click "New Study". You will be prompted to enter a Survey Name which will be used to refer to your survey going forwards.
For more information on how to create a survey from a CSV upload, click here.
Step 2: Add Questions
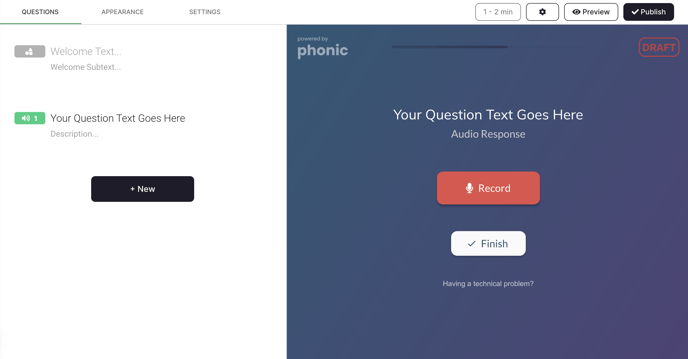
Click "+ New" and select the question type that you wish to add to your survey. Once added to your survey, you can add the question text, edit various question settings, and add multimedia/ stimuli. The survey preview to the left will automatically update to reflect any changes that you make.
Accessing Question Settings
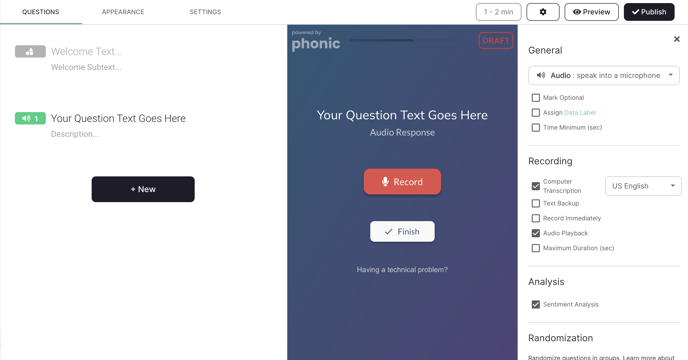
Question behaviour can be customized through Question Settings. To access Question Settings, mouse over the question of interest and click on the settings ⚙️ button. This will open the Question Settings pane on the right. Here you can enable various question settings such as: marking questions optional, adding time requirements, adding text-back up (audio questions only), allowing for multiple selections (selection questions only), and randomizing selection options or even groups of questions.
Adding Multimedia and Stimuli
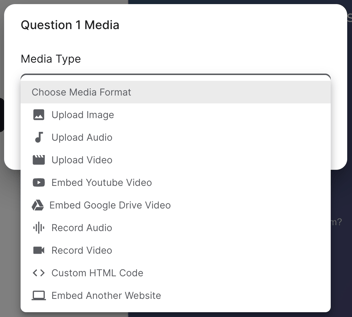
Another feature includes uploading media as part of your question (e.g., videos, images, audio files). To add media, mouse over the question of interest and click the media button. From here you can select the media type you would like to add to the question by using the drop down.
Step 3: Appearance
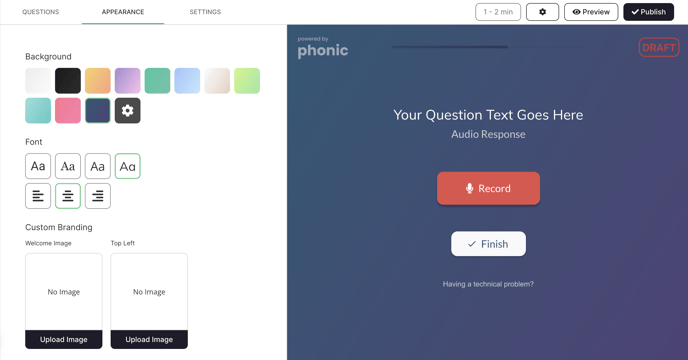
The appearance tab allows you to modify the appearance of your survey. This includes changing the background colour, font and including images and custom branding. This custom branding is optional.
Step 4: Settings
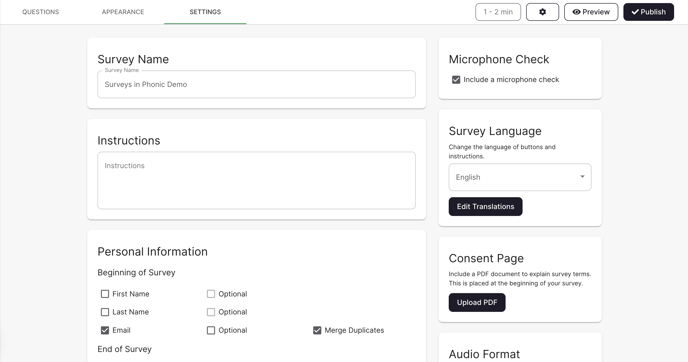
The Settings tab contains additional survey settings, including the ability to:
- Edit your survey name and add additional survey instructions
- Add a microphone check
- Change the survey language
- Upload a consent page as a downloadable PDF
- Add demographics
- Merge duplicate responses via participants' emails
- Change the audio format
- Re-direct participants upon survey completion or screen out
- Enable random conditions
- Enable "Allow participants to continue later"
Step 5: Preview and Publish
At any point during your survey creation, you can preview your survey in full-screen by using the preview option in the top right corner. This will allow you to click through your survey and see exactly how it will appear to respondents. If you are happy with the final product, you can go forward and Publish your survey using the Publish button in the top right corner.
Congrats, you have successfully launched your first Phonic survey! For more information on survey creation, collecting responses, data analytics, and more, check out the rest of our Knowledge Base!

